

How to View the Full Email Header in Gmail, Outlook, Yahoo and Other Email Services
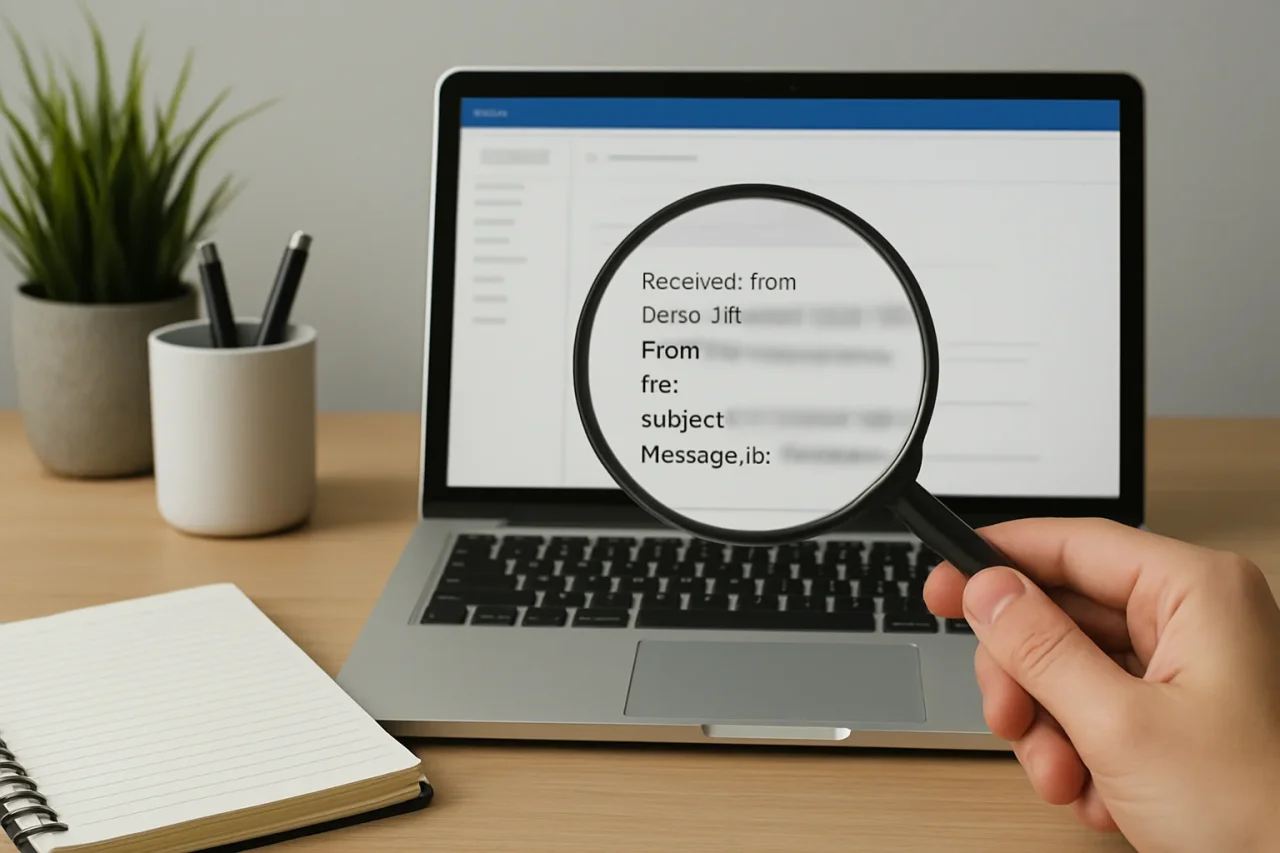
Every email you receive carries a hidden record of where it came from. This record, called the email header, lists the servers the message passed through, the time it was sent, and the results of security checks that help reveal whether the sender is genuine. Most email services hide the full header by default, showing only the sender, subject and date.
Viewing the full header is useful when you want to trace the origin of a suspicious message, check whether an email is a phishing attempt, troubleshoot delivery problems, or provide evidence when reporting abuse. This guide explains how to find the full header in the most popular email services, how to copy it safely, and how to read it.
If you use a Hotmail, Live or MSN address, your mailbox is now part of Outlook.com, so the Outlook.com instructions below apply to you.
What Is an Email Header?
An email header is a block of technical information added to a message as it travels from the sender to you. Each email server that handles the message adds its own lines, creating a trail you can follow. The most important fields are:
- From, To, Subject and Date: the familiar fields you normally see. They are written by the sender and can be faked.
- Return-Path: the address where bounced messages are sent. It often reveals the real sending domain.
- Reply-To: where your reply will go, which may differ from the From address.
- Received: one line for each server the message passed through, including server names, IP addresses and timestamps.
- Message-ID: a unique identifier created by the sending system.
- Authentication-Results: the results of SPF, DKIM and DMARC checks, which help confirm whether the message really came from the domain it claims.
- X- headers: extra information added by email providers or spam filters, such as spam scores.
How to View the Full Email Header
The steps below describe the current menu options for each service. Email providers occasionally rename or move these options, so the wording on your screen may differ slightly.
Gmail
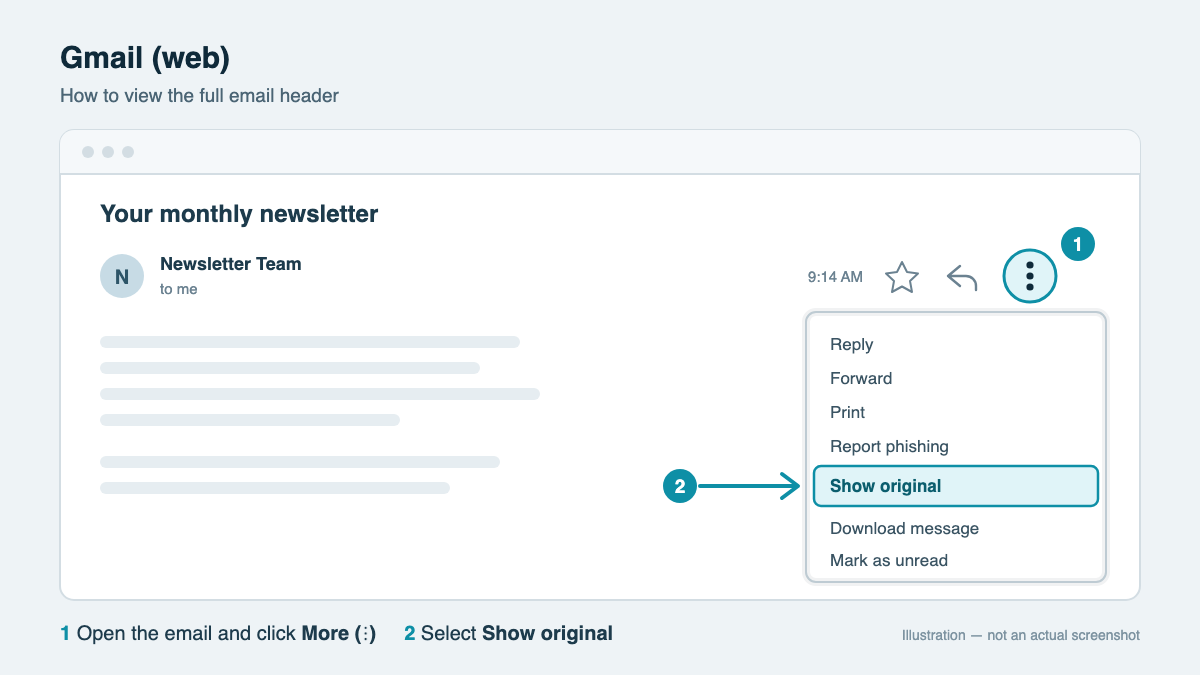
- Sign in to Gmail in a web browser and open the email.
- Click the More icon (three vertical dots) next to the Reply button.
- Select Show original.
- A new tab opens with a summary of the authentication results at the top and the full header below. Click Copy to clipboard to copy everything, or Download original to save the message as a file.
On mobile: the Gmail apps for Android and iPhone cannot show the full header. Use a web browser on a computer instead.
Outlook.com (Hotmail, Live and MSN)
- Sign in to Outlook.com and open the email.
- Click the More actions icon (three horizontal dots) at the top of the message.
- Select View, then View message source.
- A window opens showing the full header and message source. Select all of the text and copy it.
On mobile: the Outlook app does not show full headers. Use Outlook.com in a computer's web browser.
Yahoo Mail
- Sign in to Yahoo Mail in a web browser and open the email.
- Click the More icon (three dots) in the toolbar.
- Select View raw message.
- The full header and message source open in a new tab, ready to copy.
AOL Mail
- Sign in to AOL Mail and open the email.
- Click More in the toolbar.
- Select View message source.
iCloud Mail (Web)
- Sign in to iCloud.com and open Mail.
- Open the email and click the More menu.
- Select the option to show all headers or view the raw message source.
Proton Mail
- Open the email in Proton Mail.
- Click the More icon (three dots) at the top of the message.
- Select View headers.
Because Proton Mail encrypts messages and protects user privacy, some details, particularly for messages sent between Proton users, may differ from those in other services.
Zoho Mail
- Open the email in Zoho Mail.
- Click the More actions menu.
- Select Show original.
GMX and Mail.com
- Open the email.
- Open the More menu in the message toolbar.
- Select the option to view the message source or headers.
Microsoft Outlook (Classic Desktop App for Windows)
- Double-click the email to open it in its own window.
- Click File, then Properties.
- The full header appears in the Internet headers box at the bottom of the window. Click inside the box, press Ctrl+A to select everything, and press Ctrl+C to copy it.
In recent versions, you can also open the message, select the More actions menu (three dots), then choose View and View message source.
New Outlook for Windows
- Open the email.
- Click the More actions icon (three dots).
- Select View, then View message source.
Outlook for Mac
- Right-click the email in your message list. In the new Outlook for Mac, you can also use the More menu in the message.
- Select View source.
Apple Mail (macOS)
- Select the email.
- In the menu bar, choose View, then Message.
- Select All Headers to show the header above the message, or Raw Source to open the complete message source. The shortcut for the raw source is Option+Command+U.
Mozilla Thunderbird
- Select the email.
- Choose View, then Message Source, or press Ctrl+U (Command+U on a Mac).
- To show all headers above the message instead, choose View, then Headers, then All.
iPhone and Android Devices
Most mobile email apps, including Apple Mail on iPhone and the official Gmail, Outlook and Yahoo apps, do not show full email headers. You have two options:
- Use a web browser: open your webmail service in your phone's browser, switch to the desktop version of the site, and follow the steps above.
- Use a computer later: leave the message in your inbox and view the header from a desktop browser or email program.
Quick Reference
| Email service | Where to find the full header | Mobile app? |
|---|---|---|
| Gmail | More (three dots) > Show original | No |
| Outlook.com (Hotmail, Live, MSN) | More actions > View > View message source | No |
| Yahoo Mail | More > View raw message | No |
| AOL Mail | More > View message source | No |
| iCloud Mail (web) | More > Show all headers or raw source | No |
| Proton Mail | More > View headers | Varies |
| Zoho Mail | More actions > Show original | Varies |
| Outlook (classic, Windows) | File > Properties > Internet headers | No |
| New Outlook for Windows | More actions > View > View message source | No |
| Outlook for Mac | Right-click > View source | No |
| Apple Mail (macOS) | View > Message > All Headers or Raw Source | No |
| Thunderbird | View > Message Source (Ctrl+U) | No |
How to Copy and Share an Email Header Safely
When you copy a header, include all of it, from the first line to the last, especially every line that begins with "Received". Copying only the From and Subject lines leaves out the information needed to trace the message.
If you need to send a suspicious message to an IT department or abuse team, forward it as an attachment rather than forwarding it normally. A normal forward replaces the original header with a new one created by your own email account, while forwarding as an attachment keeps the original header intact. Gmail and Outlook both offer a "Forward as attachment" option.
Be careful when sharing headers publicly, such as in online forums. A header can include your own email address, your email provider's internal server names and, in some cases, IP addresses. Replace your address and other personal details with placeholders before posting.
How to Read an Email Header
A full header can look overwhelming, but you only need to focus on a few parts. Here is a simplified example:
Return-Path: <[email protected]>
Received: from mail.example-invoices.net (mail.example-invoices.net [203.0.113.45])
        by mx.recipient.example with ESMTPS id abc123
        for <[email protected]>; Mon, 12 Oct 2026 09:14:22 -0700
Received: from [192.0.2.17] (unknown [198.51.100.23])
        by mail.example-invoices.net with ESMTPSA id def456;
        Mon, 12 Oct 2026 16:14:20 +0000
Authentication-Results: mx.recipient.example;
        spf=pass smtp.mailfrom=example-invoices.net;
        dkim=pass header.d=example-invoices.net;
        dmarc=fail header.from=yourbank.example
From: "Your Bank" <[email protected]>
Reply-To: <[email protected]>
Subject: Urgent: Verify your account
Message-ID: <[email protected]>
Read the Received lines from bottom to top
Each server adds its Received line at the top of the header, so the lines appear in reverse order. The lowest Received line is closest to the sender, and the highest is your own email provider receiving the message. In the example, the message started at the IP address 198.51.100.23, passed through mail.example-invoices.net (203.0.113.45), and was then delivered to the recipient's server.
Find the originating IP address
The originating IP address is usually in the lowest Received line, inside square brackets or parentheses. Keep in mind that many major providers, including Gmail and Outlook.com, do not include the sender's personal IP address when someone sends a message through their web or mobile interfaces. In those cases, the earliest IP address you will see belongs to the provider's mail server, not to the sender's device.
You can look up any IP address in the header with an IP address lookup to see its approximate location, internet service provider and network owner.
Check the authentication results
The Authentication-Results line shows whether the message passed three standard checks:
- SPF (Sender Policy Framework) checks whether the sending server is allowed to send mail for the domain.
- DKIM (DomainKeys Identified Mail) checks a digital signature to confirm the message was not altered and came from the signing domain.
- DMARC (Domain-based Message Authentication, Reporting and Conformance) checks whether the domain in the visible From address matches the domains verified by SPF or DKIM.
In the example, SPF and DKIM pass, but only for example-invoices.net. DMARC fails because the From address claims to be yourbank.example. This is a common sign of a phishing email: the sender controls a real domain, but not the one they are pretending to be.
Warning signs of phishing and spoofing
- The domain in the From address differs from the Return-Path or Reply-To domain.
- SPF, DKIM or DMARC results show fail or softfail.
- The Received lines show servers or countries unrelated to the organization the email claims to come from.
- The Message-ID uses a domain unrelated to the sender.
- Timestamps are inconsistent, such as a message that appears to have been received before it was sent.
One warning sign alone does not prove a message is malicious. Legitimate companies often use third-party email services, which can create mismatched domains. Several signs together, especially combined with an urgent request for passwords or payment, are a strong reason for caution.
Let a tool do the work
Rather than reading the header manually, you can paste the full header into the iplocation.net Trace Email tool. It extracts the IP addresses from the Received lines and shows their approximate location and network owner. To check whether a sending server has a history of spam, run its IP address through a DNS blacklist check.
What an Email Header Can and Cannot Tell You
An email header can show which servers and networks handled a message, the approximate location of those servers, when the message was sent, and whether the sending domain passed authentication checks.
It cannot reliably identify the sender's exact physical location or identity. Senders can hide behind VPNs, proxy servers and webmail services, and IP geolocation is approximate, usually accurate to a country or city rather than a street address. Treat the results of a header trace as evidence, not proof.
If you receive a phishing email, use your email service's Report phishing option. In the United States, you can also forward phishing emails to the Anti-Phishing Working Group at [email protected] and report fraud to the Federal Trade Commission at ReportFraud.ftc.gov. In the United Kingdom, forward suspicious emails to [email protected].
FAQ
Frequently Asked Questions
01Can an email header be faked?
Partly. Senders can fake the From, Reply-To and Subject fields, and they can even insert fake Received lines below the real ones. However, the Received lines added by your own email provider, near the top of the header, are reliable, as are the authentication results added by your provider.
02Why doesn't my Gmail header show the sender's IP address?
Gmail does not include the IP address of a person who sends email through its website or apps, to protect user privacy. The header will show Google's mail servers instead. The same is true for many other major webmail providers.
03Can I view email headers on my phone?
Usually not in the mobile apps. Open your webmail service in your phone's browser, switch to the desktop version of the site, and use the steps for your provider.
04Is it safe to share an email header?
It is generally safe to share a header with your IT team or an abuse department. Before posting one publicly, remove your email address and any other personal details.
05What is the difference between "Show original" and "View source"?
They are different names for similar features. Both show the full header, and most also show the raw content of the message.
Conclusion
Every major email service lets you view the full header, although the option is usually hidden in a menu and is rarely available in mobile apps. Once you have the header, read the Received lines from bottom to top, check the SPF, DKIM and DMARC results, and look for mismatched domains. For a faster analysis, paste the header into the Trace Email tool to see where the message came from.
Comments
Comments are available to signed-in users and are moderated to keep the discussion useful and respectful. Spam, automated submissions, and low-value promotional comments are removed. Outbound links may be approved when they are relevant and genuinely helpful to readers, but they are displayed as plain text rather than clickable hyperlinks.
No comments have been published yet.
Please sign in to submit a comment.